The Art of Transformation: A Comprehensive Guide to the Makeup Process
Related Articles: The Art of Transformation: A Comprehensive Guide to the Makeup Process
Introduction
In this auspicious occasion, we are delighted to delve into the intriguing topic related to The Art of Transformation: A Comprehensive Guide to the Makeup Process. Let’s weave interesting information and offer fresh perspectives to the readers.
Table of Content
The Art of Transformation: A Comprehensive Guide to the Makeup Process
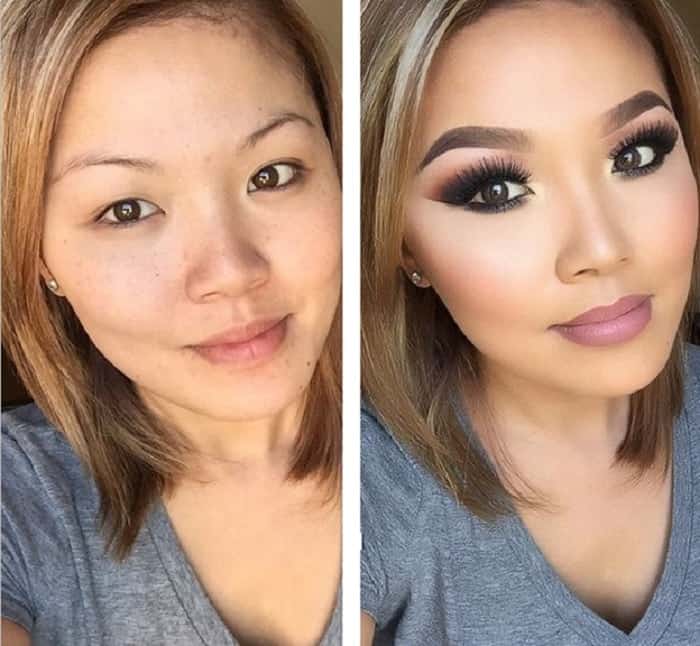
The world of makeup is a captivating blend of artistry and science, a canvas for self-expression and enhancement. From the subtle touch of foundation to the bold stroke of a winged eyeliner, makeup allows individuals to sculpt their features, accentuate their natural beauty, and project a desired image. This comprehensive guide will demystify the makeup process, providing a step-by-step breakdown of techniques, products, and considerations for achieving a flawless and personalized look.
Step 1: Skin Preparation
A flawless canvas is essential for any masterpiece, and the same applies to makeup. The first step is to prepare the skin for optimal product application and longevity.
Cleansing: Begin by gently cleansing the face with a suitable cleanser, removing dirt, oil, and makeup residue. Choose a cleanser tailored to your skin type, whether it’s dry, oily, combination, or sensitive.
Exfoliation: Exfoliating once or twice a week removes dead skin cells, revealing brighter and smoother skin. Opt for a gentle scrub or chemical exfoliant, depending on your skin’s sensitivity.
Toning: Toners help restore the skin’s pH balance after cleansing and prepare it for subsequent products. They can also minimize pores and provide hydration.
Moisturizing: Hydration is paramount for healthy skin and makeup application. Choose a moisturizer compatible with your skin type, ensuring it is fully absorbed before proceeding.
Primer: Primer acts as a barrier between your skin and makeup, creating a smooth surface for even application and enhancing product longevity. It can also help minimize the appearance of pores and fine lines.
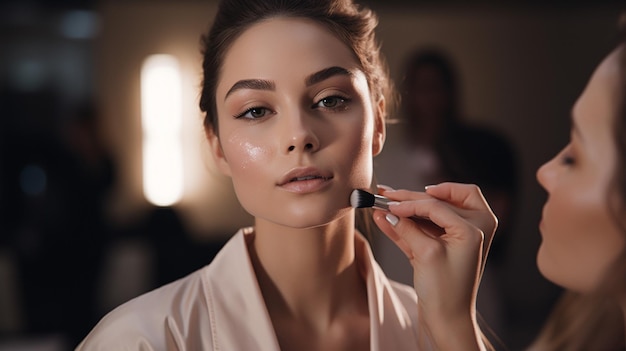
Step 2: Foundation and Concealer
Foundation serves as the base for the makeup look, evening out skin tone and creating an even canvas.
Foundation Selection: Choose a foundation that matches your skin tone precisely. Test the foundation on your jawline or inner arm in natural light for the most accurate match. Consider your desired coverage level, ranging from light to full.
Application: Apply foundation with a brush, sponge, or your fingers, blending seamlessly into the skin. Start in the center of the face and blend outwards, paying attention to the hairline and jawline.
Concealer: Concealer targets specific areas like under-eye circles, blemishes, or redness. Choose a shade that complements your foundation or is one shade lighter for highlighting.
Concealer Application: Apply concealer with a small brush or sponge, gently dabbing it onto the target areas. Blend it out carefully for a natural finish.
Setting Powder: Setting powder helps to set the foundation and concealer, preventing creasing and ensuring longevity. Apply it lightly with a brush or sponge, focusing on areas prone to oiliness.
Step 3: Eyeshadow and Eyeliner
The eyes are the windows to the soul, and makeup can enhance their natural beauty and create captivating looks.
Eyeshadow Selection: Choose eyeshadow palettes that complement your eye color and desired look. Experiment with different shades and textures to find your favorites.
Eyeshadow Application: Apply eyeshadow with a brush, starting with a light shade on the entire lid and blending upwards towards the crease. Add a darker shade to the crease for depth and definition, blending it out for a seamless transition.
Eyeliner Selection: Eyeliner comes in various forms, including pencils, liquid liners, and gel liners. Choose the type that suits your skill level and desired effect.
Eyeliner Application: Apply eyeliner along the lash line, creating a thin line for a natural look or a thicker line for a bolder statement. For a winged eyeliner, extend the line outwards and upwards, creating a sharp angle.
Mascara: Mascara adds volume, length, and definition to the lashes. Choose a mascara that suits your lash type and desired effect.
Mascara Application: Apply mascara with a brush, wiggling it from the root to the tip of the lashes for maximum impact. Apply multiple coats for added volume and length.
Step 4: Blush and Bronzer
Blush and bronzer add warmth and dimension to the face, enhancing its natural contours.
Blush Selection: Choose a blush shade that complements your skin tone and desired look. Peach, pink, and coral shades are popular choices.
Blush Application: Apply blush with a brush to the apples of the cheeks, blending it upwards towards the temples.
Bronzer Selection: Bronzer adds warmth and definition to the face. Choose a shade that complements your skin tone and desired look.
Bronzer Application: Apply bronzer with a brush to the hollows of the cheeks, the temples, and the jawline, blending it out for a natural contour.
Step 5: Lips
The lips are a focal point of the face, and makeup can enhance their natural shape and color.
Lip Liner Selection: Lip liner helps define the lip shape and prevent lipstick from bleeding. Choose a shade that matches or complements your lipstick.
Lip Liner Application: Apply lip liner along the natural lip line, creating a smooth outline.
Lipstick Selection: Lipstick comes in a wide range of colors and finishes, from matte to glossy. Choose a shade that complements your skin tone, outfit, and desired look.
Lipstick Application: Apply lipstick with a brush or directly from the tube, starting in the center of the lips and working outwards.
Lip Gloss: Lip gloss adds shine and dimension to the lips. Apply it over lipstick or wear it alone for a subtle shimmer.
Step 6: Setting Spray
Setting spray helps to lock in makeup, ensuring longevity and preventing smudging.
Setting Spray Application: Hold the spray bottle 6-8 inches away from the face and mist it evenly over the entire face. Allow it to dry completely before touching your face.
FAQs by Makeup Process Step by Step
Step 1: Skin Preparation
Q: What are the benefits of using a primer?
A: Primer creates a smooth surface for makeup application, enhancing product longevity, minimizing the appearance of pores and fine lines, and helping to control oil production.
Q: Can I skip cleansing if I’m not wearing makeup?
A: It’s essential to cleanse your face daily, even if you’re not wearing makeup, to remove dirt, oil, and environmental pollutants.
Q: How often should I exfoliate?
A: Exfoliate 1-2 times per week, depending on your skin type and sensitivity.
Step 2: Foundation and Concealer
Q: How do I find the right foundation shade?
A: Test the foundation on your jawline or inner arm in natural light for the most accurate match. Choose a shade that blends seamlessly with your skin tone.
Q: What’s the difference between foundation and concealer?
A: Foundation evens out skin tone and creates a smooth canvas, while concealer targets specific areas like under-eye circles, blemishes, or redness.
Q: What is setting powder, and why is it important?
A: Setting powder helps to set foundation and concealer, preventing creasing and ensuring longevity.
Step 3: Eyeshadow and Eyeliner
Q: What eyeshadow colors complement different eye colors?
A: Blue eyes: warm browns, copper, and gold shades. Green eyes: purples, plums, and taupes. Brown eyes: most colors work well, but consider blues, greens, and golds.
Q: How do I create a winged eyeliner?
A: Start with a thin line along the lash line and extend it outwards and upwards, creating a sharp angle. Use a steady hand and a small brush or pen for precise application.
Q: How can I make my lashes look longer and thicker?
A: Use a lash curler to curl your lashes before applying mascara. Apply multiple coats of mascara, wiggling the brush from the root to the tip of the lashes.
Step 4: Blush and Bronzer
Q: Where should I apply blush?
A: Apply blush to the apples of the cheeks, blending it upwards towards the temples.
Q: How do I choose the right bronzer shade?
A: Choose a shade that complements your skin tone and desired look. It should be one or two shades darker than your natural skin tone.
Q: How do I apply bronzer for a natural contour?
A: Apply bronzer to the hollows of the cheeks, the temples, and the jawline, blending it out for a natural contour.
Step 5: Lips
Q: How do I choose the right lip liner shade?
A: Choose a shade that matches or complements your lipstick.
Q: What’s the difference between matte and glossy lipstick?
A: Matte lipsticks provide a flat, non-shiny finish, while glossy lipsticks offer a shine and dimension.
Q: How do I apply lipstick evenly?
A: Apply lipstick with a brush or directly from the tube, starting in the center of the lips and working outwards.
Step 6: Setting Spray
Q: What are the benefits of using a setting spray?
A: Setting spray helps to lock in makeup, ensuring longevity and preventing smudging.
Q: How do I apply setting spray properly?
A: Hold the spray bottle 6-8 inches away from the face and mist it evenly over the entire face. Allow it to dry completely before touching your face.
Tips by Makeup Process Step by Step
Step 1: Skin Preparation
- Cleanse your face twice daily, morning and night, to remove impurities and maintain a healthy complexion.
- Exfoliate 1-2 times per week, depending on your skin type and sensitivity, to remove dead skin cells and reveal brighter skin.
- Use a moisturizer that’s suitable for your skin type to keep it hydrated and supple.
- Apply primer before foundation to create a smooth surface for even application and enhance product longevity.
Step 2: Foundation and Concealer
- Choose a foundation that matches your skin tone precisely for a natural finish.
- Apply foundation with a brush, sponge, or your fingers, blending it seamlessly into the skin.
- Use a concealer that complements your foundation or is one shade lighter for highlighting.
- Apply concealer with a small brush or sponge, gently dabbing it onto the target areas and blending it out carefully.
- Set foundation and concealer with a setting powder to prevent creasing and ensure longevity.
Step 3: Eyeshadow and Eyeliner
- Experiment with different eyeshadow palettes and techniques to find your signature look.
- Start with a light shade on the entire lid and blend upwards towards the crease.
- Add a darker shade to the crease for depth and definition, blending it out for a seamless transition.
- Choose an eyeliner that suits your skill level and desired effect, whether it’s a pencil, liquid liner, or gel liner.
- Apply eyeliner along the lash line, creating a thin line for a natural look or a thicker line for a bolder statement.
- Curl your lashes before applying mascara for added lift and volume.
Step 4: Blush and Bronzer
- Choose a blush shade that complements your skin tone and desired look, whether it’s peach, pink, or coral.
- Apply blush to the apples of the cheeks, blending it upwards towards the temples for a natural flush.
- Choose a bronzer shade that complements your skin tone and desired look, one or two shades darker than your natural skin tone.
- Apply bronzer to the hollows of the cheeks, the temples, and the jawline, blending it out for a natural contour.
Step 5: Lips
- Choose a lip liner shade that matches or complements your lipstick for a defined look.
- Apply lip liner along the natural lip line, creating a smooth outline to prevent lipstick from bleeding.
- Choose a lipstick shade that complements your skin tone, outfit, and desired look, from matte to glossy.
- Apply lipstick with a brush or directly from the tube, starting in the center of the lips and working outwards for even application.
- Apply lip gloss over lipstick or wear it alone for a subtle shimmer.
Step 6: Setting Spray
- Apply setting spray after completing your makeup look to lock in the products and prevent smudging.
- Hold the spray bottle 6-8 inches away from the face and mist it evenly over the entire face.
- Allow the setting spray to dry completely before touching your face.
Conclusion by Makeup Process Step by Step
The makeup process is a journey of self-expression and artistry, allowing individuals to enhance their natural beauty and project their desired image. By understanding the steps involved, from skin preparation to setting spray, individuals can create a flawless and personalized look. Remember that practice makes perfect, and experimentation is key to discovering your unique style. Embrace the transformative power of makeup, and let your inner artist shine through.


Closure
Thus, we hope this article has provided valuable insights into The Art of Transformation: A Comprehensive Guide to the Makeup Process. We appreciate your attention to our article. See you in our next article!